Showing posts with label Health. Show all posts

Friday, June 6, 2014

Homemade Healthy Toothpaste that works - Whitens too!

I just got back from the dentist and they had to do very little scraping. Yea! The main thing I attributed this change to is the homemade toothpaste I have been using. Yep, homemade, organic, and works! It is even whitening my teeth. 

On top of all that, it is cheap and easy to make! Score! 

I found a recipe on Pinterest that took me to JJ Begonia's site. The toothpaste recipe she had looked good, and I had all the ingredients on hand. 

A little warning before you run off and make this. It does not taste like normal toothpaste. You will be brushing with baking soda, which has a very salty flavor--not something most of us are used to in our toothpaste. However, it also doesn't include any of that junk that the national brands have in them so it is much better for you. 

Here is the recipe for easy reference. I made minor modifications to the original: 

Teeth Whitening Toothpaste

Ingredients (Makes 2 Ounces)

3 Tablespoons organic Baking Soda (find it HERE)
3 Tablespoons organic Coconut Oil--I always use Nutiva (find it HERE)
2 Teaspoons Hydrogen Peroxide (find it HERE
1/4 packet Stevia (find it HERE)
5 or 6 drops Organic Peppermint Oil to taste (find it HERE)

Directions
Mix the baking soda and coconut oil until smooth. Add peroxide and stevia and mix. Put in 5-6 drops of peppermint essential oil and do a final mix. Store in an airtight container. 


I have read where some people caution against using baking soda to brush the teeth every day, saying it will damage the enamel. My dentist didn't state that baking soda would harm my teeth at all. 

I have also seen similar things about hydrogen peroxide. There is so little of it in this mixture, and I use the 3%, so it has been fine for me to use. My teeth are definitely whiter than they have been in a while.

Happy brushing! 
Laureen

Sunday, June 1, 2014

MMMMmmmm Muffins

Have I mentioned I like baked goods? MMMmmmmm Hot from the oven, yummy, fluffy, baked goods. With my eating plan cutting out all wheat and sugar, it has put a big dent in my enjoyment of baked goods. This isn't just a gluten free thing, it's a no wheat thing so gluten free flours are out. 

I have found a way to make cookies, both baked and no-bake but I wanted more. This morning I jumped into muffin making with both feet, and by am I glad I did! YUM!

These muffins use buckwheat flour, which is not a wheat, surprisingly. Buckwheat is made from the seeds of a fruit which are in the same family as rhubarb. See this wikipedia link for more info: Buckwheat. Since it isn't a wheat there is no gluten in it naturally. I am eating for heath these days and buckwheat seems much healthier to me than overly processed wheat. 

I also used almond meal or flour and some gluten free oats. These 2 ingredients made the muffins more dense and hearty than what we made in my Rum Cake Donut Muffin recipe.

To replace the sugar, I used Xylitol and Stevia. Both of these sweeteners are natural and do not include chemicals. Stevia is an herb and Xylitol is made from birch. Neither of these sweeteners raise blood sugar nor impact the pancreas. 

Taking all of that in mind, here is the recipe.  

Note that the buckwheat will make them dark. The batter will be dark and the muffin will be dark. But the flavor is great. Give them a try!  


Healthy Muffins (makes 32 mini muffins)

1/2 cup organic buckwheat flour
1/2 cup almond meal or flour
¾ cup gluten-free oats 
1-½ teaspoon baking powder
½ teaspoon salt
¾ teaspoon nutmeg
¾ teaspoon cinnamon


⅓ cup coconut oil
½ cup organic birch Xylitol
1 packet Stevia
1 egg (for vegan, substitute a flax egg)
¾ cup almond milk (or coconut or hemp)

Preheat the oven to 350ยบ. Whisk together the flours, oats, baking powder, salt, nutmeg, and cinnamon.

In a separate bowl, add coconut oil, sugar, egg, and milk. Mix to combine until thoroughly blended.

Add dry ingredients to wet ingredients and stir only to combine.

Coat your muffin pan with a little coconut oil cooking spray and scoop the batter evenly among the cups. I filled a 24 mini-muffin tin and had enough for another 8.

Bake at 350 degrees for 8-12 minutes. The muffin should spring back when you lightly touch the top.

Let the muffins cool for about 10 minutes in the pan. Remove from pan and allow them to cool another half hour or so. 


Topping

Ingredients: 
3 Tablespoons Earth Balance "butter"

3 Tablespoons Xylitol or 1 teaspoon Stevia
2 teaspoons cinnamon

Melt the butter in a microwave safe bowl or on the stove. Mix the sweetener and cinnamon in a second bowl. Quickly dip the muffins in the butter and then roll them in the sweetened cinnamon. I just did the tops but you can do the whole muffin if you want--you just may need to double your topping recipe to cover all the muffins.

Tap off any excess cinnamon and they are ready to eat. 


I am loving the fact that I don't need flour or sugar to make a yummy treat. Hope you enjoy them too! 

Laureen

Wednesday, May 21, 2014

Claims in Beauty Product--Don't pay extra for buzz words!

I went to a large beauty store the other day. You know the kind, the ones with all sorts of brands of products in one place.

I was surprised and amazed to see claims like "gluten-free" and really
high-priced products that include plant stem cells. 


Gluten? 


Well, I don't know about you, but I don't expect flour to be in my beauty products. Unless you are buying an oatmeal mask, "gluten-free" labeling has no place in beauty products. 

Gluten is a protein that makes dough elastic. I never expect that any lotion I purchase would include in it's ingredients wheat flour, rye flour, or anything else that naturally has gluten in it. Would you? 
 
Gluten is only bad for your gut, and only in certain people. Since you aren't eating your beauty products, don't worry about gluten in them! 

I suppose these same products could be labelled sugar free and dairy free too, right? I doubt there are a lot of beauty products, other than sugar scrubs, that have added sugar. I also doubt they put a lot of dairy products in there that will expire. 

So please don't pay more for a product just because it has a fad label. Save your money for things that really work.


Plant Stem Cells? 


My second shock came when I saw really high priced products that included plant stem cells. For a stem cell to work, it has to match other cells. And no matter how hard you try, a vegetable or fruit stem cell will never match a human cell. I found additional information here, Lifeline. The most important part of the article states: 

"Apple stem cells clearly work for apples. Watermelon stem cells are perfect for watermelons. But they don’t have any benefits to humans unless, as InStyle wrote, “you want to look like a tree”.  One plant stem cell skincare brand claims to produce more collagen and elastin. There’s no scientific evidence of that, and  their ability to proliferate skin cells, repair wounds or stimulate collagen and elastin in people is limited, at best."

Products with stem cells included are expen$ive!! Don't pay for something that will never work and provide no benefit to you. 

Save your money and use clean, non-toxic products. Look at the labels and find the ones where you can read most of the ingredients. 

I hope I saved you some hard-earned money today. Feel free to comment and ask questions. 

Laureen


Tuesday, May 13, 2014

My Story and my Path

I appreciate you all following me and reading my blog. I started it because I wanted to help people who were searching for a healthier balanced life including food, beauty products, work-life balance, and fun. I love creating party designs and have quite a few posts about how to DIY your own party. 

I also have a lot of health posts, including healthy recipes. The healthy posts are due to my need to keep myself alive. 

Yep. As hard as it is to admit, daily I work to sustain my health so I won't sneak into the cancer range. 

Eight years ago, I went to my doctor for my annual exam. I have thyroid and blood pressure issues (that is for another post) and I needed to have my blood drawn to make sure my medication levels were good. I mentioned I was tired so my doctor also ran my Sedimentation (Sed) rate. The Sed rate is an indicator of inflammation in the body. Usually your Sed rate is under 20. A reading of 100 is a sign of serious illness. Mine came back at 92. 

92

I was shocked and scared. What was going wrong in my body? 

The doctor sent me to a cardiologist and after weeks of heart monitoring and other tests we determined my heart was good. So I was sent to a Rheumatologist. Maybe it was arthritis or a joint issue. I could deal with that. Weeks of tests again showed nothing. But the Rheumatologist had one more test for me, which was a blood test. 

I don't think I will ever forget the day of my appointment with him for the results. This was an in-person kind of result, not a phone call. He told me I might have a blood/bone marrow cancer so he was sending me to a Hematology Oncologist. I think my world stood still. Blood cancer? Bone marrow cancer? If I was going to get cancer why couldn't it be something that they could remove?

I was 42 years old. I was in the prime of my life. I was just a little tired. Isn't everyone a little tired?

The Hematology Oncologist did all sorts of test. He redid the blood tests, took x-rays of every bone in my body, tested my kidneys, and sent me for a bone marrow biopsy. 

I was just under the cancer levels for multiple myeloma and was pretty much told that the disease would progress until I had cancer and then I could discuss treatments. I was sent to places that specialize in treating severe cancers and who are supposed to provide hope. I received no hope. 

Don't get me wrong, my Hematology Oncologist is wonderful but they are taught that there are no cures for certain things. 

Something about this diagnoses made me curious. Our bodies want to work correctly, and mine was not. If I gave it the right stuff, whatever that may be, why couldn't my body fix itself? 

Doctors had no cure, so what did I have to lose? At the time, I read that MM is caused by either exposure to chemicals or a virus. I couldn't do much if a virus caused this, but I could control my chemical exposure. So began our purging of our cleaning products and our food. My husband started cooking and would cook only organic food. We researched and cleared out all toxic chemical from our cleaning products (vinegar is wonderful).

I added only clean things into my body while doing all sorts of cleanses to get the toxins out (contact me if you want the details, I am happy to share).  And guess what? It worked! My numbers stabilized. I went from having blood tests every 3 weeks to now, once a year. My numbers still go up and down (up is bad) but I have remained stable. YEA ME! 
Me! 


The path to this point is fraught with twists and turns, however. I had a bout with depression, weight gain, and slip ups. I will post more about these as time goes on. 


So please enjoy my blog, my recipes, DIY pieces, and my party designs. I will continue to give information on how I am bringing by body back to health. And finding my new normal, which continues to change. 


Yours in Life, 
Laureen


Thursday, April 24, 2014

Eating out doesn't have to be a splurge

I enjoy eating out but recently have stopped because of the eating plan I am on. I have cut out all sugar, wheat, dairy, rice, beans, corn, soy, and more. I feel so much better and my brain works now! But I missed meeting up with friends, girls nights out, and having dinner out with my husband. 

This week I threw all caution to the wind and agreed to meet a friend at, of all places, the Cheesecake Factory. Nothing tempting there, right? 

I did what all good people on eating plans do before they go to a restaurant and looked online at their menu. I found a roasted chicken dish that I could have but it was similar to what I had been eating at home. 

Then I saw Cashew Chicken. Oh man did that sound good. I looked over the whole menu and there were salads that would be okay (as long as the dressing was vinaigrette) and there was a turkey sandwich if I didn't eat the bread. So okay I had options. 


When we met at the restaurant the Cashew Chicken still called out to me. I love stir fries and I wanted it. It came over a bed of steamed rice. No can do. I have never seen a restaurant that would serve stir fries without the rice. 

I summoned my courage and asked the waiter if it could be done. He said yes and asked if I wanted an extra vegetable instead? That sounded weird to me, but I asked for my options. 

Asparagus?  Eh. Sounded like an odd combination. 
Carrots? Nope, too sugary. 
Spinach? Hmmm. Cashew chicken and spinach. That sounded okay so I agreed to that. 

Oh my gosh! What came out was way better than I expected. 

I received a huge bowl with sauteed chicken and cashews on a huge bed of lightly steamed spinach. It was incredible! Such a great combination! I was in heaven. 

Everything in my bowl was okay to eat and in scarfing down my bowl full of yumminess, I forgot to take a picture. Which means I will just have to go back and order it again so you can see how fabulous the whole plate was! (heh heh)


Thank you Cheesecake Factory for helping me stick to my eating plan! Who would have thought? 


This experience taught me that I can go out to eat if I work with the wait staff and ask them for options. 

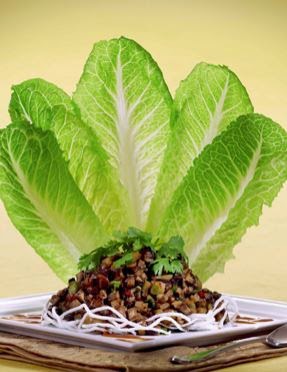
Since I didn't have pics of my own fabulous dinner, I grabbed a few shots from the Cheesecake Factory website so you can see some other options. Lettuce wraps are usually good (watch for the rice noodles and too many starchy veggies on the side, as well as sweetened dipping sauces), or the herbed chicken I mentioned earlier (above).

So the next time you are in a place that serves something on rice, try a vegetable instead. It was so darn good! 

Tonight is a friend's birthday and we are heading to a local Mexican food place. Stay tuned to see how well I stick to plan. 

Wish me luck!
Laureen

Saturday, March 22, 2014

Traveling Healthy: Cooking in my Hotel Room without Setting off the Fire Alarm


I love science. Science experiments are fun to me. Any experiment is fun for the most part. I am on business travel for a few weeks and I really want to stick to this eating plan. It's been more difficult than I thought because I am having trouble finding cooked organic food in the area. I have this lovely little family owned organic grocery near my home. 

Here they have gargantuan stores with restaurants inside the grocery. Seriously. It is the oddest thing. I have been taking pictures and sending them home to my husband. 

But most of the food isn't organic. My solution? Purchase a Rival Electric Skillet from Amazon and have it shipped to the hotel. I am an Amazon Prime member, so it arrived in 2 days. 

When it arrived I looked at it and realized it would cause steam, smoke, and heat. Will it set off the smoke alarms? 

I get evacuated from hotels enough. For a while the alarms would go off in my hotel about every other trip (I did not cause the evacuations). On a side note, it's really funny to see what people sleep in. As such I always pack sweats and tennis shoes and keep them near the bed. 

So this morning I made breakfast. In the skillet. In the room. And to be extra daring, I cooked bacon. Smoky--needs decent heat to cook--bacon. I also made scrambled eggs and for the first time noticed how much steam comes off of the darn things. But it worked! NO ALARMS! SUCCESS! 

Breakfast is served. 

I use Applegate Farms Bacon because it is nitrate free and organic. It has the best taste. I brought salt, pepper, and oregano with me, since I like to season my eggs with them. Organic eggs were pretty easy to find.

Now to clean up the mess and air out the bacon smell in the room before they come in to clean. 

Bacon grease disposal
I used a combination of a hotel glass and extra baggies I had brought with me to dispose of the bacon grease. Line the cup with plastic and the baggie. Wrap the top of the baggie over the edge of the glass. Wait for the grease to cool a bit, then pour it into the baggie-lined glass. Set it near the air unit in the room to congeal. Once solid, remove the baggie from the glass, seal it, and dispose. Viola!  

Here is to staying healthy, one small step at a time. 


Happy, healthy, travels!  
Laureen

Friday, March 21, 2014

Healthy Traveling

I am on a business trip for 13 days. When I travel it is more stressful than being at home and I used to soothe that stress by treating myself to things I usually wouldn't eat: pancakes, cookies, catered food for lunch, pasta at business dinners, desserts, an extra glass of wine... You get the picture. 

Well now I am working to stick to my healthy eating and eliminate all sugar, artificial sweeteners, wheat, gluten, rice, beans, dairy, and caffeine. So much for pancakes and pasta dinners.

As I eat healthier and more pure foods (no processing at all), I am finding joys in the simple things. And I am thrilled to have found a way to satisfy my sweet tooth. 

After leaving the airport, I made a bee line for the organic grocery store that is closest to my hotel. I had created a shopping list before my trip and wanted to have as much food on hand as I could so I wouldn't be tempted to grab something. Being hungry, tired, and stressed is a sure fire way for me to eat pizza and cake (not "or", "and"). Not exactly wheat, gluten, sugar, or dairy-free. 

I have found that one of my most favorite and crave reducing items is a granny smith apple with almond butter. Make sure the almond butter is freshly ground and has no added sugar. 

If I want a little sweetness, I sprinkle Stevia on of the almond butter. It is so darn good! I cut up the apple into slices so it provides that comfort food feel and spread the almond butter on thick. 

The best part about this eating plan is that I don't have to limit the quantity of the food I eat. So I can apply the almond butter liberally to each apple slice. 

Try my latest treat. I am sure you will like it as much as I do. It is filling, has great fiber, protein, and healthy fats. And it tastes so darn good! 

Here's to your health! 
Laureen

Thursday, January 23, 2014

Homemade Healthy Coffee Creamers - Easy and SOOOO Good!

I love coffee in the morning. Every morning. Especially after the alarm has gone off waaaay too early. See, I'm not a morning person. I try to be. I have been working at it for many years but no luck. Every time I get some time off I end up staying up late and sleeping in. It's just part of my body's natural rhythm. 

But duty calls. Work meetings often start at 7 AM so I have to be up and starting my day by 5:30 or 6:00 AM. Coffee is my saving grace at that point. 

I started drinking coffee with those flavored creamers. They made the coffee sweet and took away the bitterness. I have quite the sweet tooth so this was a yummy way to start my morning. 

As I have moved to healthier eating, I kept drinking creamers for a while since I figured I wasn't ingesting too much of them each day. However, I then realized what I was doing. I had cleaned up my diet but was ingesting chemicals, and things that cause cell inflammation, first thing in the morning and essentially starting my day in the worst possible way. 

It was time to make my own. 

I also found cacao. Ooooh. I am spoiled. I mean really spoiled. I have a friend that lives in Guatemala and has found someone who harvests WILD cacao beans, processes them as little as possible, and creates bricks of the best cacao in the world. I love this stuff. I add it to my coffee every chance I get. 

I also found raw honey and other things that make my coffee taste fabulous and make my body feel good. By the way, if you use the raw honey recommended below, take a spoonful and eat it every morning along with putting one in your coffee. 


Coffee "Creamer"

1/2 cup almond, coconut, or hemp milk, unsweetened and unflavored
2 Tablespoons Raw Honey
(adjust to taste)

3-4 Tablespoons raw cacao (adjust to taste)
1/2 teaspoon cinnamon, nutmeg or any spice you like (adjust to taste)

Add the milk, honey, and cacao to a double boiler. Heat gently until the honey and cacao are melted. Remove from heat and sprinkle in cinnamon and other spices of your choosing. Pour into a pitcher and viola! Homemade Creamer. This will last for a few days, depending on how much coffee you drink and how much creamer you use. 

 
I found these cool little Mini Glass Creamer bottles at Crate and Barrel that are now on sale for 50 cents! They are not only cute--adorable even!--but I can easily carry them to work with me so I don't have to use the creamers provided at work.


Variations:
  • Amaretto Creamer:  Add a teaspoon of almond extract to the milk instead of the cinnamon and omit the cacao for almond or amaretto flavoring. 
  • Vanilla Creamer:  Omit the cacao and add a teaspoon of vanilla extract or vanilla bean (split, insides removed, and all added to the pot with the milk). Steep the vanilla bean for at least a half hour. Strain the mixture before you put it into the pitcher. 
  • Almond "Joy": Use coconut milk, 1/2 teaspoon almond extract and 1/2 teaspoon coconut extract. You can keep the cacao or leave it out depending on your mood. 

Can you see where these recipes are going? Just add in whatever flavors you love. Keep the ingredients all organic and as unprocessed as possible. If you can't figure out the ingredients for a certain flavor favorite, post a comment and I will help. 

Now, it's time for my morning joe! Ahhhhh

Happy Sipping!
Laureen 

Sunday, January 5, 2014

All the Comforts of Home

I will be traveling for business more this year. I have a love/hate relationship with business travel. I really like being at home. I can have everything my way.

And since I have been adding more healthy items to my diet, it makes it more difficult to eat the way I like while on the road. 

I like having my homemade coffee "creamer"; I like drinking my lemon, apple cider vinegar, and aloe gel in sparkling water at night. I miss those things when I travel. 

As I will be traveling more, I wanted to bring home with me. So I don't have to miss the things that make me feel good every day. 

 
I found this cool little Mini Glass Creamer bottles at Crate and Barrel that are now on sale for 50 cents! They are not only cute--adorable even!--but I think they can give me a bit of home in an easy to carry container.

I have put my lemon juice/apple cider vinegar/aloe juice concoction into one. I am freezing that to keep the ingredients chilled while I travel. And I have added some raw honey, cinnamon, and raw cacoa to another to use as my creamer! I will let you know how they work out when I return. 

Although this probably guarantees I will have my luggage searched by TSA agents, I still think it's worth it. Remind me to tell you about my travels when I used to bring a bag of epsom salts with me! HA! I finally learned to keep them in the original bag.  

Here's to hoping I don't end up with luggage full of honey and my clothes don't end up smelling like apple cider vinegar. I will update this blog post when I return to let you know how it went.


Post trip update---the bottles worked amazingly well! No leakage! My luggage was searched by TSA but I was not surprised by that. I had put ingredients lists on each one, put them in small plastic bags, then put both bottles into a larger plastic bag with a couple of paper towels, just in case. The towels were dry when I got there. After defrosting and using, one of the lids cracked so I need to determine a better lid for the containers but this idea is a go. I will never travel without my concoctions again.


Happy Travels and #happyhealthy2014!
Laureen


Saturday, January 4, 2014

Flu Fighting Tea - DIY and Organic!

I get sore throats a lot. Not just from viruses but also from talking a lot. Have I mentioned that I talk a lot? 

I recently found a great recipe on Pinterest that I have made. It makes the most soothing tea! I am also detoxing my body this year so my stomach has been upset. This also includes stuff to calm the stomach. The tea is relaxing, soothing, and smells like heaven. 


One of my sisters (I have 6) swears by gargling with alcohol (brandy, cognac, etc.) to cure a sore throat. So if you are a believer in alcohol killing all germs, feel free to do this before you drink your tea. Or add it into your tea. Everybody is different and you need to use what works for you.

You can find this recipe all over Pinterest but I will add it below too. Below the recipe I will add in additional things you can add to your tea and how they benefit your body. 


Flu Fighting Tea 

1 organic lemon
1" piece of fresh ginger
1 Cup Raw Honey-pourable

Container to put it all in. 


Slice the lemon into thin slices then cut them into pieces that will fit into your container.

Peel the ginger and use either the peeler or a knife to cut small small pieces of ginger. Fresh ginger can be quite strong so chop more finely than the lemons. Add the ginger to the container.

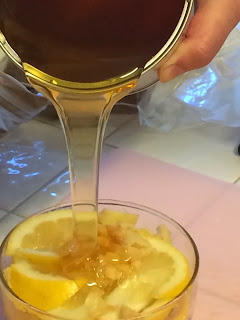
Pour the raw honey over the lemons and ginger. Use the knife to make sure the honey is seeping into all the crevices and filling the container. I fill the container with honey, but leave a 1/2" gap at the top because when the lemon juice mixes with the honey the whole mixture expands a little. 

Cover tightly and set aside. The lemon juice will be pulled out of the lemons and mix with the honey. The ginger essence will also mix into the honey making one of the most yummy concoctions. 

Eventually the lemon, including the rind, will break down in the honey and create a jelly looking mixture. 

To use: put a tablespoon or 2 into a cup and add hot, not boiling, water. Stir and enjoy. You can breathe in the scents and it will help soothe sinuses. Then sip the tea.


Ingredient benefits and additions:

Raw Honey Benefits
Lemon Benefits
Ginger Benefits

Additions:
Sprinkle any of these into your tea to add additional flavors and benefits. 

Cinnamon Benefits
Cayenne Benefits  (if your stomach is upset, don't use this one).
Alcohol (drinking too much will compromise your immune system--everything in moderation)

Here's to a #HealthyHappy2014!
Laureen

Saturday, December 28, 2013

DIY Healthy Beauty Products! All homemade!

This Christmas, my family and I agreed to make things for each other. I went through old recipes, thinking Pumpkin bread, flavored vodkas, or spice combinations. Last year I made fresh bread with  blueberry, red wine compote, and jalapeno jelly honey butter. They were yummy! 

I wanted to do something new this year. Something I hadn't tried before. I figured worst case scenario, I could fall back on flavored vodkas and olive oils. 

So I decided on skin products and lip balm. I use organic ingredients so they are high quality products. I made a lip balm, antibacterial hand cream, and soothing skin salve. 

 The lip balm was included shea butter, sunflower oil, cocoa butter, peppermint extract, raw honey, and a little bees wax. The raw honey doesn't mix well with the oils so I might omit it next time. If you want to include the honey, add just a little. I have to admit that it does make the lip balm taste really good. And this stuff stays on your lips for hours! That is, if you don't lick off the honey. Click here for the recipe.


The natural antibacterial moisturizing lotion was a bit of a cheat in that it started with lotion. I added in vitamin E, coconut oil, eucalyptus essential oil--which is the natural antibacterial, and almond oil. This one needs a mixer so you can whip it together. At first I didn't whip it and the coconut oil didn't mix well with the lotion. 

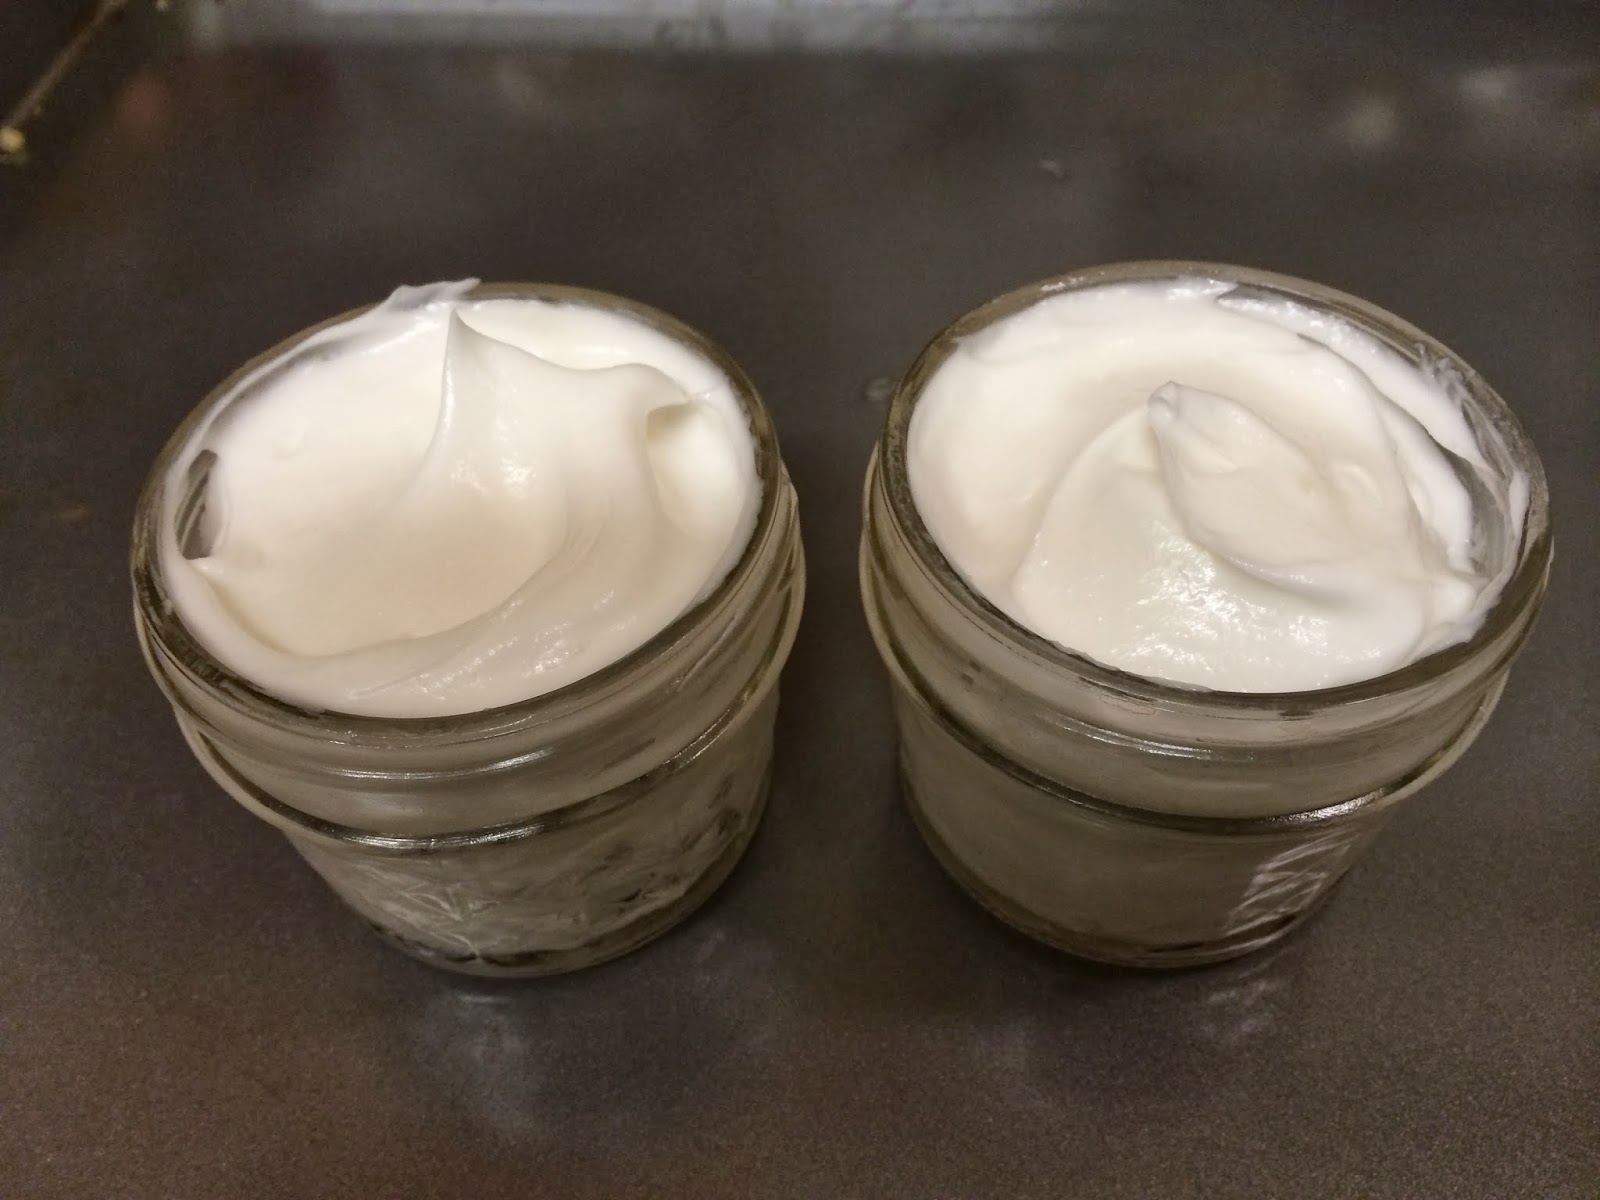
I scooped the product back out of the containers and whipped the ingredients and it came out looking like it does in the picture...fabulous!

The final healing salve is made of olive oil, coconut oil, vitamin E oil, bees wax, lemon essential oil, orange essential oil, tea tree oil, and a little lavender essential oil.

This one is my favorite. It is fabulous for dry skin. It stays on the skin and is absorbed slowly so don't touch anything for a while until it soaks in. But it also works better than pure shea butter to soften and soothe skin. 

You can find many recipes for these items on Pinterest but I will post my recipes here soon. I plan to continue to work on them to pack in as many healthy and healing ingredients as possible into future versions. 

To a Healthy, Happy New Year! 
Laureen


On Sale Now at The Knot Wedding Shop

Saturday, December 14, 2013

Eggnog Yogurt Breakfast - Incredibly yummy, healthy, and easy!

I love the idea of eggnog. That sweet creamy texture, the addition of spices. It is so darn yummy. Yet it goes bad so fast if you get the good stuff! I am not a big milk drinker so that is why I say I love the idea of eggnog.

I found a way to have my eggnog and eat healthy too. On a day when I wanted something different for breakfast, I mixed it into my vanilla yogurt and OH MY GOODNESS!  

I like to add some granola and my husband bought me a new flavor he found: Salted Chocolate Granola! WHAT? REALLY?! Oh yum. When I first made this concoction, I used a cranberry nut granola and it was good, but the Salted Chocolate? HOLY COW! 

So here is what you will need: 

  • 3/4 to 1 Cup of a good organic vanilla yogurt. I usually have coconut yogurt but they were out so I got a cows' milk yogurt. 
  • 1/4 Cup of a really good eggnog. I prefer Straus Family Creamery but if you have a local creamery, try them! 
  • 1/8 - 1/4 Cup granola. Homemade is best but I don't always have time and I love Cocomo Joes. And the Salty Chocolate flavor can't be beat. 
  • Cinnamon to taste.
  • Nutmeg to taste.
Put all ingredients into a nice bowl and stir. I like to let mine sit for about 5 minutes so the granola softens a little but if you like yours really crunchy, enjoy immediately. 


Saturday, November 9, 2013

Gloves - This Winter's Fashion Statement

Picture (c)  of Vogue Magazine
I am a huge fan of elegance and decorum from the 1940s and 1950s. I also think some of the things they did for fashion make great sense today. The way they wore gloves in those days must have kept them all healthier since they weren't touching germy doors with bare hands. 

Okay, so I am a bit of a germaphobe. Alright, a LOT of a germaphobe. I wash my hands as soon as I get to my office, I wash my hands throughout the day. I touch door handles and elevator buttons with my sleeve or the back of my hand instead of my fingers. And I ALWAYS use hand sanitizer after I pump gas. 

If you think about it, we walk around touching door handles, railings, elevator buttons and such that hundreds of people have touched before us. 
Is it any wonder we pass so many illnesses around? 

So I am adding gloves into my wardrobe this fall. They will stay a part of my wardrobe through the year and not just with formal gowns or in snow. 

One of my favorite looks for gloves is worn by the editor of the magazine in the movie Funny Face. The gloves are a little longer and flared so they cover her cuffs. Click the video below to see the wonderful Think Pink clip from the movie. 


I have begun my hunt for the perfect gloves that will look great and add a certain panache to any outfit.         

Gloves can be cute and sassy at wrist length, or more mid-forearm length with a flare to keep blouse and jacket cuffs clean until you get to your destination.     

You can get great vintage finds on eBay for very little cost. Click here for the results of a search on eBay. I have recently found a seller with some great options and have purchased the ones in the pictures you see here. 

Since my favorite ones were longer, I found these fabulous flared gloves to the right. I love the detail at the wrist and can't wait to see how they look with my favorite blazers. 

I also purchased some of the short ones. I found a great deal on 2 pairs with fabulous design. I can even wear them with jeans and a sweater. 

 
I love the detailing on these gloves. They remind me of the ones the office women had on in the Funny Face video link above. 
 
The detailing on the wrist is wonderful and the colors go with everything. These gloves are made out of cotton so they wash and dry in a delicate load.    

I live in an area that doesn't get too cold so these gloves will work well for me through the winter. Those of you in snowy areas can still wear cute gloves by choosing ones that have a bit of flare and style. There are some adorable wool and leather gloves available today.
  
Cute faux fur cuffed gloves


Isotoner Tech Touch Gloves with Faux Fur C... Find arm and hand wear at Target.com! Isotoner tech touch gloves with faux fur cuff - b... [More]
Price: 19.99
Isotoner Tech Touch Gloves with Mint Polka...
Find arm and hand wear at Target.com! Isotoner tech touch gloves with mint polka dot cu... [More]
Price: 19.99


You can also wear the vintage cotton gloves when running from your house to car to the heated malls or businesses.   Add some flare to your winter accessories and join me in bringing back gloves year round.   
Think of how gorgeous and healthy we will all be! 

Yours in Style,    
Laureen